
The standing split is one of the more advanced yoga positions and works to enhance flexibility in the hamstrings, hip mobility, and balance. Urdhva Prasarita Eka Padasana is a variation of the prone leg lift that has the leg lifted from behind and balanced on the front leg. Yoga blocks and wall support can be used for beginners to safely progress.
What is a standing split?
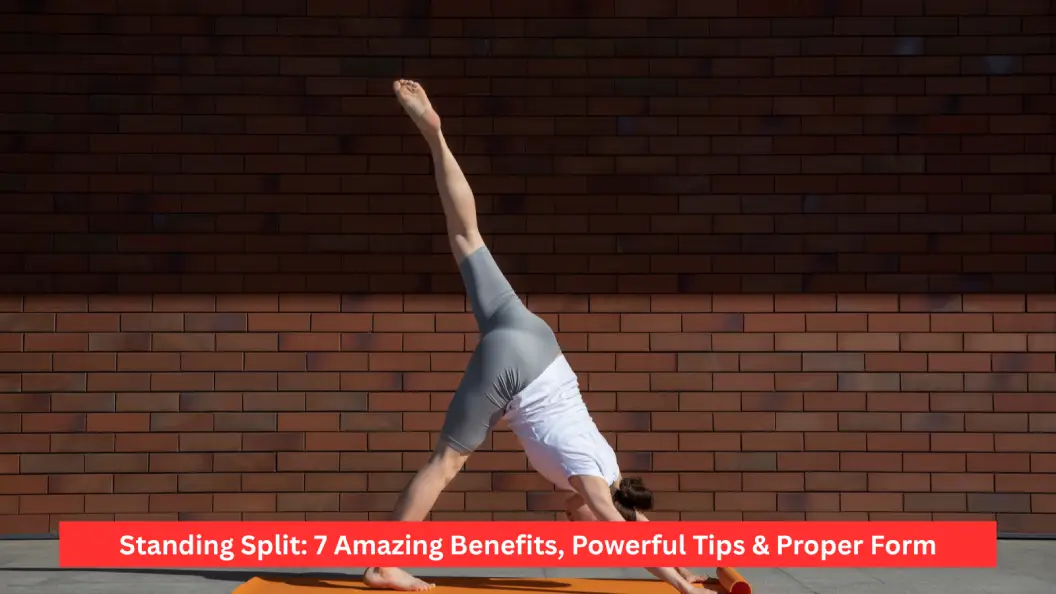
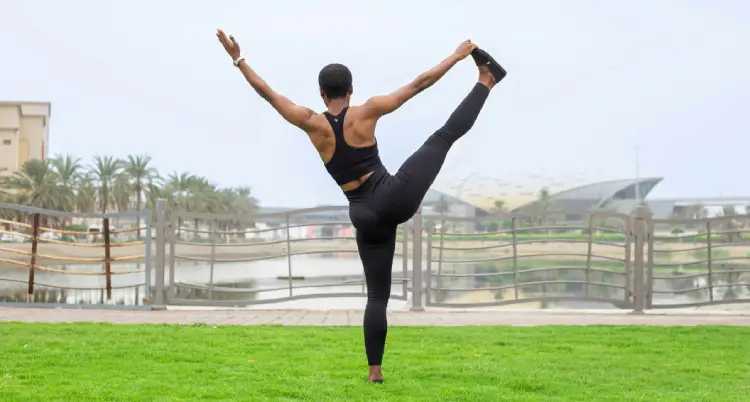
Split yoga is a yoga flexibility and balance pose that involves standing on one foot, bending the upper body forward, and raising the other leg to the ceiling behind you. Your left and right hands are placed on the floor or yoga blocks for support and balance.
It’s also called Urdhva Prasarita Eka Padasana in Sanskrit. It is a forward fold, standing balance, and deep stretch in the legs and hips. This is not a split position as with a conventional split, as you must control your body on one leg.
It is a common pose for yoga, dancers, gymnasts, or flexibility buffs. This demands hamstring flexibility, hip stability, hip control, and core engagement.
A standing split may seem challenging, but it’s not necessary to straighten your leg upward to get the benefit of the exercise. A beginner’s position could be lower (but still within the range), and they can work up to the higher position with regular practice.
Benefits of the Standing Split
The standing split offers several potential benefits when performed with controlled movement and appropriate modifications. It is particularly useful for people who want to develop flexibility and balance as part of a broader fitness routine.
1. Improves Hamstring Flexibility
One of the primary benefits of the standing split is its ability to stretch the hamstrings, the muscles located along the back of your thighs. These muscles help control hip movement and bend your knees.
During the pose, the standing leg’s hamstrings lengthen as you fold your torso forward. Practicing comfortably over time may improve your flexibility and make other movements, such as forward folds and certain yoga poses, easier.
Avoid forcing your chest toward your leg or locking your knee. A gentle, controlled stretch is preferable to an intense stretch that causes pain.
2. Supports Hip Mobility
The standing split challenges your hips through a combination of forward folding and lifting one leg behind your body. This position encourages controlled movement at the hip joints and requires coordination between the surrounding muscles.
Regular mobility practice may help you move more comfortably during yoga, dancing, and other physical activities. However, individual hip anatomy can affect how high you can lift your leg, so a perfectly vertical position is not necessary.
3. Develops Balance and Coordination
Balancing on one leg requires your muscles and nervous system to work together to maintain a stable position. The standing split adds another challenge by requiring you to control your torso and lifted leg at the same time.
With consistent practice, you may improve your balance, coordination, and awareness of body positioning. Beginners can use a wall or yoga blocks to reduce the difficulty while learning the movement.
4. Strengthens Supporting Muscles
Although the standing split is mainly known as a flexibility pose, it also requires muscular effort. Your core helps stabilize your torso, while the glutes and muscles around your standing leg help maintain control.
The lifted leg also requires active engagement rather than simply hanging in the air. For a more balanced routine, combine the standing split with exercises such as glute bridges, single-leg deadlifts, and controlled leg raises.
5. Encourages Better Body Awareness
The standing split requires you to pay attention to your breathing, alignment, balance, and range of motion. This can help you recognize when your hips begin to rotate or when you are stretching beyond a comfortable position.
Developing this awareness can make your flexibility practice more controlled. Move slowly, breathe normally, and adjust the pose whenever you feel unstable.
6. Complements a Yoga Flexibility Routine
The standing split can complement a yoga routine that includes forward folds, low lunges, half splits, and hip mobility exercises.
It is generally better suited to practitioners who already have some hamstring flexibility and experience with basic standing poses. Beginners should first develop a comfortable range of motion through easier variations.
7. Helps Develop Controlled Movement
Lifting and lowering your leg slowly requires coordination between your core, hips, and supporting leg. Practicing with control may help you become more aware of how your body moves through different positions.
This benefit is especially relevant to dancers and yoga practitioners who need to coordinate flexibility with stability. However, the standing split should complement strength training rather than replace it.
How to Do a Standing Split Correctly
When performed with the proper technique, the standing split will help to ensure you remain balanced and avoid putting unnecessary strain on yourself. If you have trouble keeping your position comfortable while on the floor, use yoga blocks.
Step 1: Begin in a Standing Position
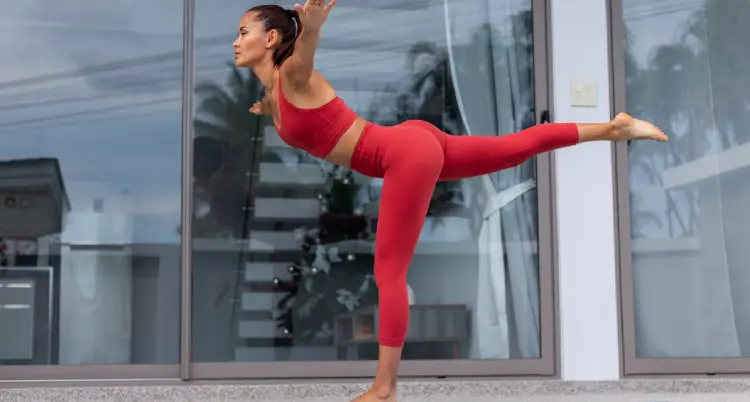
Feet should be about hip-width apart. Relax your shoulders and maintain your spine in a comfortable, neutral position.
Take a few deep breaths and ensure that the floor is not slippery. New to balance poses, practice in proximity to a stable wall.
Step 2: Fold upper body forward.
Hinge at the hips and slowly move your torso towards your thighs. If hamstrings feel tight, bend knees slightly.
Rest your hands on yoga blocks or on the floor. Do not put your hands on the ground if this results in too much curvature in your back.
Step 3: Shift Your Weight Onto One Leg
Transfer your weight gradually onto one foot while keeping the supporting knee soft. Place your hands firmly on the floor or blocks to help stabilize your upper body.
Keep your movements slow and controlled rather than shifting your weight suddenly.
Step 4: Lift Your Other Leg
Raise your opposite leg behind you, keeping the movement within your comfortable range. Focus on lengthening the leg rather than forcing it toward a vertical position.
Try to keep your hips relatively square toward the floor. Do not twist your pelvis excessively just to make the lifted leg appear higher.
Step 5: Maintain the Position
Engage your core gently and breathe normally. Keep your hands supported and your standing foot stable.
If comfortable, hold the pose for approximately 10–20 seconds. Beginners can start with a shorter hold and gradually increase the duration as their control improves.
Step 6: Lower Your Leg Slowly
Lower the lifted leg carefully and return to a forward fold or standing position. Avoid dropping the leg suddenly or rushing out of the pose.
Repeat on the other side, using a similar range of motion and hold time.
Common Standing Split Mistakes
Avoiding common mistakes can make the standing split more comfortable and help you develop better technique.
| Mistake | How to improve |
| Forcing the lifted leg too high | Lift only as far as you can maintain control. |
| Rounding the back excessively | Bend the standing knee and use yoga blocks. |
| Twisting the hips outward | Keep your pelvis controlled and facing mostly downward. |
| Locking the standing knee | Maintain a soft knee without painful hyperextension. |
| Holding your breath | Breathe slowly and naturally throughout the pose. |
| Ignoring discomfort | Stop if you experience sharp pain, tingling, or joint discomfort. |
The goal is not to achieve the highest possible leg position. Prioritize controlled movement, comfortable stretching, and stable alignment.
Standing Split Modifications for Beginners
Usually, beginners don’t have to do a complete standing split right away. These changes can be done in a gradual manner to develop flexibility and balance. Standing Split with Yoga Blocks
Use yoga blocks under your hands to lower the floor to you. This may help to keep you in a comfortable position for your torso without too much rounding of your back.
Standing knee slightly bent, lift the other leg as far as you can control.
Standing Split Against a Wall
Practise against a wall for extra support. It can be used in different setups and, depending on your mobility, to help stabilize your position or to support your lifted leg.
Slowly enter into the stretch; do not press hard on the foot or hip.
Low Standing Split
Do not lift leg high; hold it closer to the floor. Keep your balance, lengthen your spine, and control your hips.
If your hamstrings are tight or you don’t have a lot of experience with balance poses, this is a good place to start.
Practice Preparatory Stretches
Get your body ready with some soft dynamic leg swings, low lunges, half splits, and supported forward folds. These exercises are good for familiarising yourself with the movements in a standing split.
Always warm up prior to stretching, and maintain a steady pace while stretching when cold.
Standing Split vs. Seated Split
Both the standing split and seated split involve separating your legs, but they require different combinations of flexibility and balance.
| Feature | Standing split | Seated split |
| Main challenge | Balance and flexibility | Flexibility and positioning |
| Body position | Balancing on one leg | Sitting with legs separated |
| Balance demand | High | Low |
| Hamstring flexibility | Important | Important |
| Core engagement | Helps stabilize the body | Helps control posture |
| Beginner modification | Blocks or wall support | Cushions or support beneath the hips |
The standing split generally places greater demands on balance because your body is supported by one leg. A seated split reduces the balance challenge but may require substantial flexibility in the hips and legs.
Neither variation is automatically better. Choose the version that matches your mobility, experience, and goals.
Tips to Improve Your Standing Split
- Warm up: Stretch Hamstrings and Hips before stretching.
- Practice both sides: Develop even flexibility and control.
- Use support: Use yoga blocks or a wall for support.
- Tighten core: Keep balance and alignment.
- Breathe normally: Do not make deeper stretches.
- Work consistently: Work gradually to minimise risk of injury.
The standing split will take weeks or months to learn, depending on how easily you can split and how much you practice until you can do it. It can be done in two weeks for some people who are flexible, but it’s too long for many newbies. More complicated variants like oversplits tend to need more flexibility and control.
Safety Precautions
The standing split is a demanding flexibility exercise, so preparation and technique matter. Avoid bouncing, forcing your lifted leg upward, or pulling yourself deeper into the stretch with your hands.
Stop and come out of the pose carefully if you experience sharp pain in your hamstrings, hips, knees, or lower back. Stretching may create mild tension, but it should not cause sudden pain, tingling, or numbness.
Use a non-slip surface and keep stable support nearby if you are concerned about losing your balance. If you are recovering from an injury or have significant balance limitations, consult a qualified healthcare professional before attempting advanced flexibility work.
Conclusion
The standing split is a challenging yoga pose that combines hamstring flexibility, hip mobility, balance, and muscular control. It can be a valuable addition to your yoga or flexibility routine when practiced with appropriate modifications and gradual progression.
Start with supported variations, keep your hips controlled, and focus on comfortable movement rather than achieving a perfectly vertical leg position. With consistent practice and proper technique, you can work toward a deeper standing split while developing better balance and body awareness over time.
Frequently Asked Questions
1. What is a standing split?
A standing split is a yoga pose where you balance on one leg while lifting the other behind you to improve flexibility and balance.
2. Are standing splits difficult?
Yes, standing splits can be challenging because they require hamstring flexibility, hip mobility, balance, and core control.
3. How long does it take to learn a standing split?
It may take several weeks or months, depending on your starting flexibility, consistency, and practice technique.
4. Can I achieve a standing split in two weeks?
Some flexible people may progress quickly, but beginners usually need more time. Practice gradually to reduce the risk of injury.